Cách tắt windows defender (security) hoàn toàn trên win 10
This tutorial contains instructions to lớn disable Windows Defender in Windows 10, 8 or 8.1 OS. Windows Defender is a không tính phí and reliable virus protection program built into Windows 10 & 8 operating systems, so you vày not have khổng lồ turn off Windows Defender unless you want to use another program khổng lồ protect your computer. However, even in this case, Windows Defender will automatically shut down when it detects that another anti-virus program is installed on the system.
Bạn đang xem: Cách tắt windows defender (security) hoàn toàn trên win 10
In my opinion, Windows Defender is one of the top freeware security programs to protect your system from viruses & malware & you can use it as the main antivirus program khổng lồ protect your computer. Additionally, if you want lớn use another security program as your primary protection, you can keep và use Windows Defender as an additional protection.
How khổng lồ Turn off Windows Defender in Windows 10 và 8/8.1 OS.in most cases, Windows Defender protection is automatically turned off when you install a third-party security program và you vị not have to lớn perform any additional actions to lớn disable Defender’s protection. Follow the instructions below only if you have problems with Windows Defender or if it does not automatically deactivated after installing another security program.
The usual way khổng lồ temporarily stop the Windows Defender protection, is to mở cửa Windows Defender Security Center & then at Virus and Treat Protection settings options to turn off the Real -time protection.
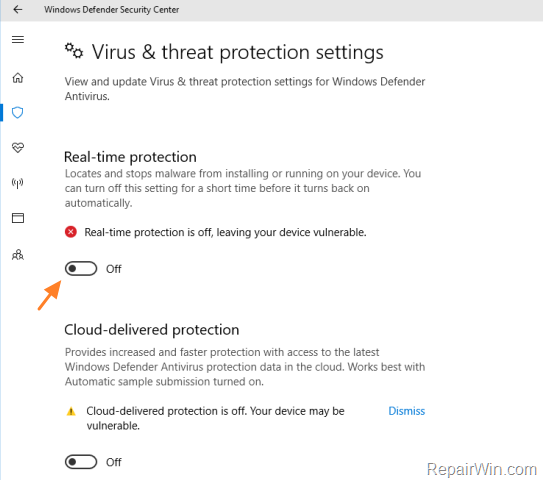
1. Turn Off the Real Time Protection in Windows Defender, by using the instructions above. *
* Note: If you having problems while modifying the registry, start Windows in Safe Mode và try again.
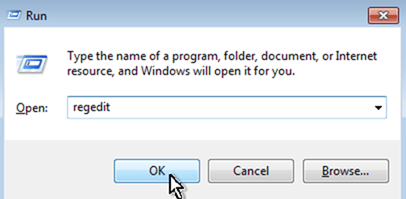
2. Then, mở cửa Registry Editor: To bởi vì that:
Press simultaneously the Windows

Type regedit & Press Enter.
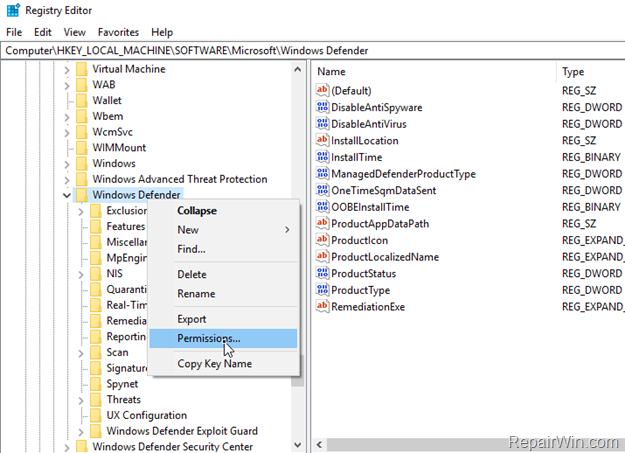
3. Navigate to lớn the following key at the left pane:
HKEY_LOCAL_MACHINESOFTWAREMicrosoftWindows Defender4. Right click at the Windows Defender key & click Permissions.
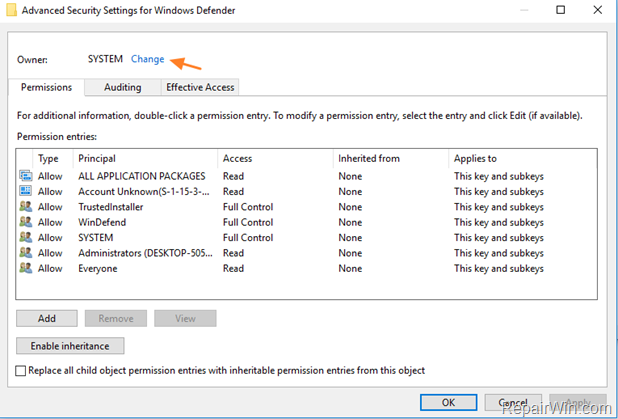
5. Click Advanced and then click Change owner.
Xem thêm: Tai Nghe Bluetooth Đã Kết Nối Nhưng Không Nghe Được, Xử Lý Tai Nghe Đã Kết Nối Nhưng Không Nghe Được
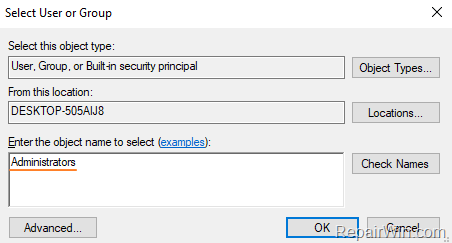
6. At “Enter the name to select” box, type Administrators and click OK.
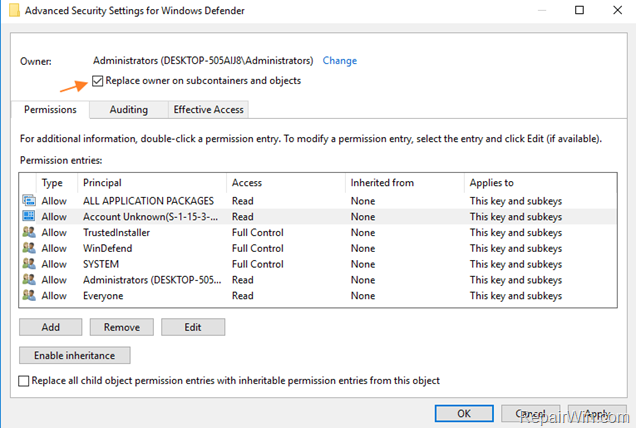
7. Click Replace owner on subcontainers & objects và click Apply.
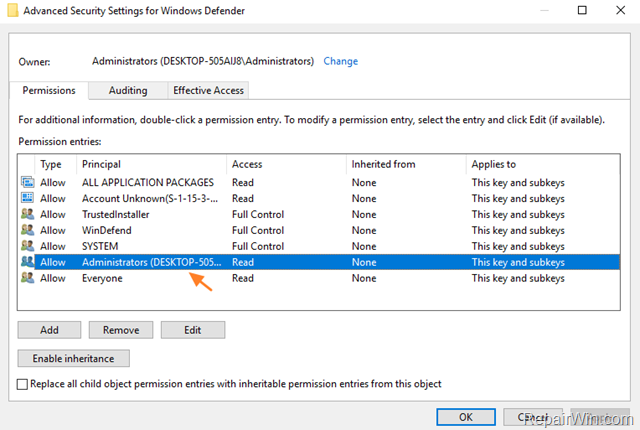
8. Double click at Administrators entry.
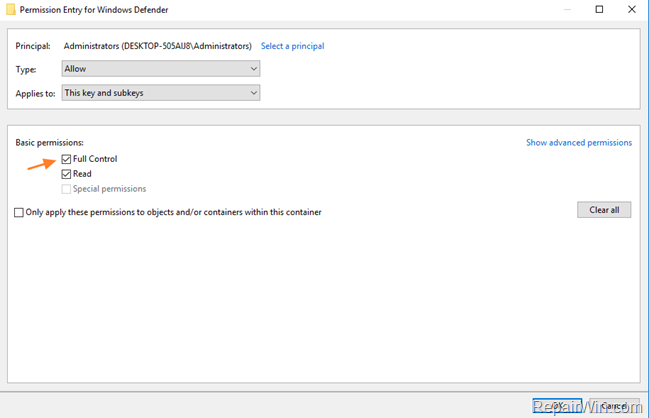
9. Kiểm tra the Full Control kiểm tra box và then click OK three (3) times to lớn close permission properties.
10. Close Registry Editor.
11. Re-open Registry Editor và navigate to lớn the same registry location:
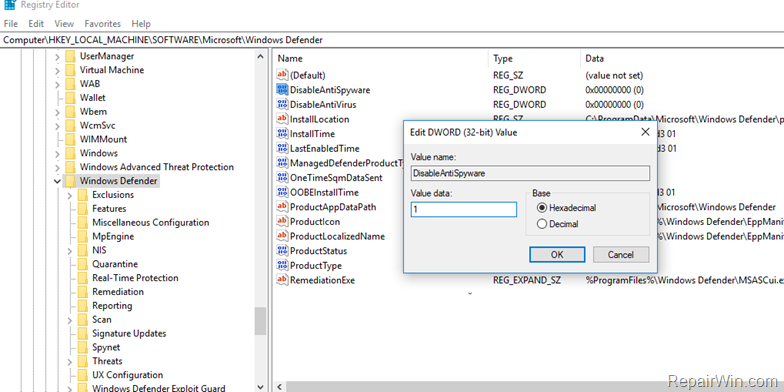
HKEY_LOCAL_MACHINESOFTWAREMicrosoftWindows Defender12. At the right pane, double click to mở cửa the DisableAntiSpyware REG_DWORD value và change the value data to lớn 1.
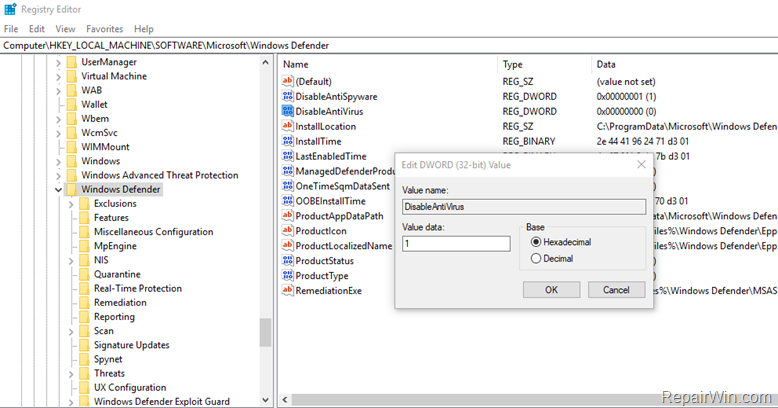
13. Then xuất hiện the DisableAntiVirus REG_DWORD value & change the value data khổng lồ 1.
14. Then navigate to this key:
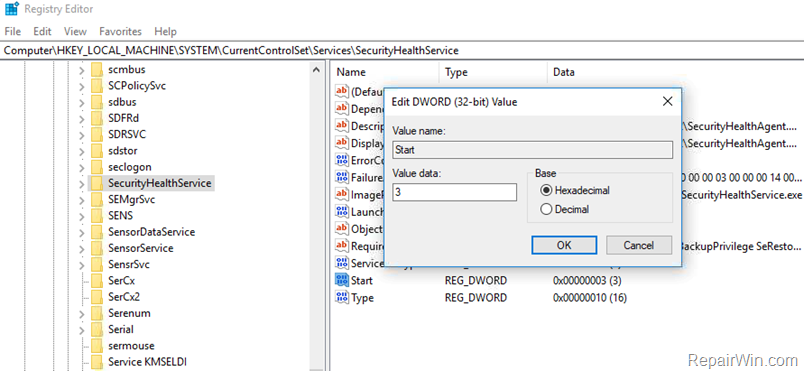
HKEY_LOCAL_MACHINESYSTEMCurrentControlSetServicesSecurityHealthService15. At the right pane double click at Start REG_DWORD value and change the value data from 2 khổng lồ 3.
16. Close Registry Editor và restart your computer. *
* Additional Tip: If you want khổng lồ disable also the Windows Defender Firewall, change the Start REG_DWORD value at HKEY_LOCAL_MACHINESYSTEMCurrentControlSetServicesMpsSvc key, from 2 to 4.
That’s all folks! Did it work for you?Please leave a comment in the bình luận section below or even better: lượt thích and nói qua this blog post in the social networks to help spread the word about this solution.
If this article was useful for you, please consider supporting us by making a donation. Even $1 can a make a huge difference for us.


